Simple start
From sselab
You have been invited to the sselab and you have no idea what this means?
You probably shall share some documents within a team and come to an integrated final document easily (--> version control) or shall collect thoughts, ideas, problems etc.(--> wiki).
Simple storage like Dropbox (--> storage) is also available as well as a automatically generated mailing list (--> mailing list). Let's forget about all the other services for now and lets handle this:
- You need to make an account.
(Having an account simplifies access when using multiple projects. All services and projects can be accessed and managed with one account and password.)
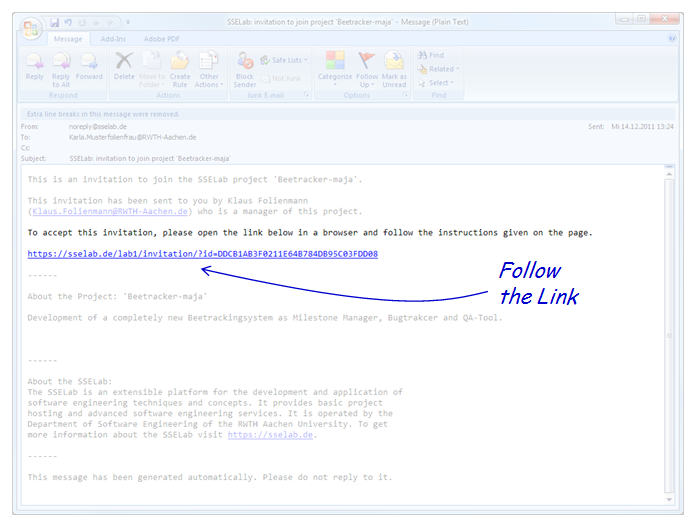
- You got an invitation via email. Click the link in that email.
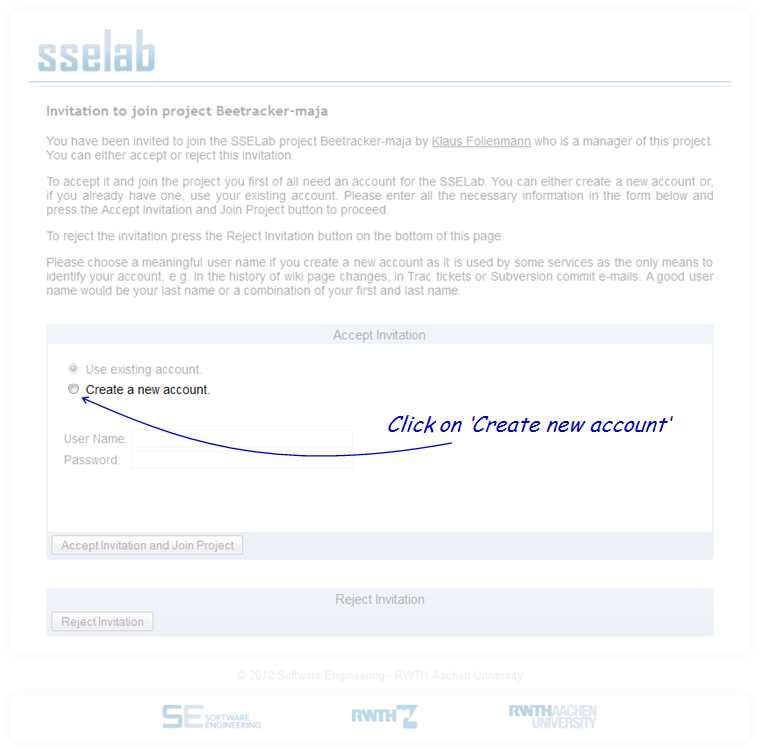
- Choose 'Create new Account' if you don't have one yet.
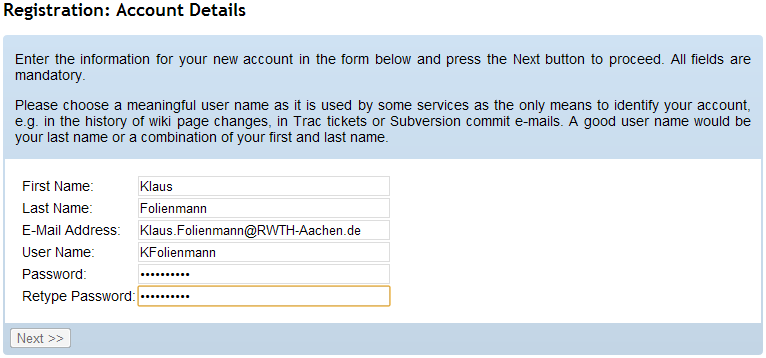
- Enter some personal data, it is really helpful to use your surname as login (or another name that identifies you to the other team members).
- You now have the account and are member of the project.
- This allows you to login to sselab and browse the project data.
Contents |
What's next?
You can
- Browse the projects services
- Checkout svn (if it is a selected service)
- Look at the internal and external wikis (if selected services)
- Note that the external wiki is globally visible, while only you can write
- Install the webdav (if selected service)
- Look at the mailinglist
- BTW: When the project is called "example", the according maillinglist where you can reach all other members is "example@lab9.sselab.de"
Mailing List
You want to send an email to all project members (and managers)?
- Click on 'Mailing List' on the project's overview page in the services List
Wikis
Its simple:
- browse the project,
- click on "MediaWiki (internal)"
- and you are looking at the wiki. Its a mediawiki -- same syntax, same features.
This is just an abstrct overview -- see [http:/XXX here for more]:
- To edit full page: click "Edit" on the left side
- To edit a section: click "[edit]" on the right side
- When the page is important and you want to be informed by email of any change: click "Watch"
Some syntax:
bold text - '''bold text'''
italic text - ''italic text''
- list element - * list element
- numbered list element - # numbered list element
File:Example.jpg - [[File:Example.jpg]]
By clicking on the new link you are led to the upload dialog. Just try it, when you need to insert a picture or another file. You will see, it is very easy.
link title - [http://www.example.com link title]
An Hyperlink to the specified url (here 'http://www.example.com' which appears to the reader of the wiki article as 'link title' ).
Headline 2
- = Headline 2 =
Headline 1
- = Headline 1 =
This is can be used to create a subpage as well.
Version Control (Subversion)
Subversion is a relatively mighty and therefore also complex technique to concurrently work on files. When people really work on shared files concurrently, it's important to have versioning available: subversion does this! And to manage conflicts in concurrent changes: subversion does this too! (When a conflict arises or you want an older version you need a deeper understanding or have to ask. E..g. have a look here. For simple cases:
- You need to install a local subversion client. You may choose. XXX is quite good, but Eclipse plugin also helps.
- Please install your svn-client
- Checkout the files using the name and password of your sselab-account.
- Then you are ready to operate.
As an alternative for read only access:
- browse the project,
- click on "Subversion"
- and you have webaccess to the current(!) revision (!no changes!).


